The Van

Thursday, 13 June 2013

Extra Work Surface ( Part 1).

Hello!
We've Been using the van a lot lately for days out enjoying the sunshine . I like cooking in the van ,but there's a distinct lack of work surface! Now, I know that there are compromises that have to be made due to internal size and layout etc.So this problem needed addressing urgently.

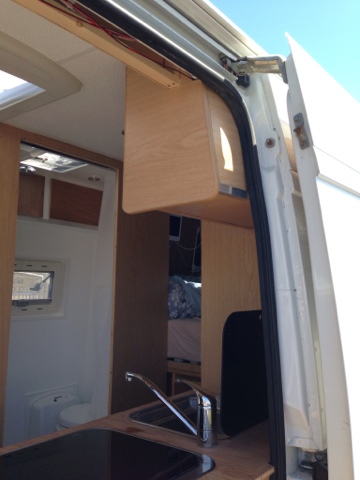
I've fitted a smev sink ( no drainer ) and a three burner hob.The draining of crockery etc is taken care of by the purchase of a plastic unit from Lidl.This works well,but when the sink and hob are in use at the same time, there's nowhere to put it!

The front of the wardrobe is not finished yet,so I had an idea for a pull out work top.This has been made using a pair of sliding drawer runners.They have ball bearings inside and work very smoothly.the top is a prototype at the moment and will be changed fora thicker piece of ply and laminated with Formica to match the other surfaces at a later date.

I'm pleased with the result and next job is to make a fold up surface for the other end of the kitchen unit.

Stephen .


Sunday, 9 June 2013

Cab Curtain

Hello! This post has been requested by Christine!
A cab curtain is a duel purpose fitment.In winter time,when drawn it keeps heat in the back ( as the front of the van isn't double glazed).In summertime drawing the curtain on a hot sunny day ( something of a novelty in England !!), keeps the back cool, as the front cab area acts likes green house.Also when trying to stealth camp in urban areas drawing the curtain blocks out light being omitted from the rear.

For my curtain I bought a black fleece throw and cut it in half.Ive done this as we mainly wildcamp and if we need to drive off at short notice then the curtains can be parted for quick access to the cab.I also wanted the sides of the curtains to be tight fitting.This is going to be achieved by using iron on Velcro . The passenger side has been completed.Velcro was cut to length and one piece has been glued to the side of the door pillar,next to the sliding door rubber.This allows a tight fit and stops light,draughts coming through.The other piece of Velcro is then ironed on to the side of the curtain.
The curtain fits very well and as the side sticks to the pillar ,it doesn't blow about when the The sliding door is opened on a windy day.At the moment the curtains are hung using a wire,but this is only temporary until the cupboard above the cab is finished.


Tuesday, 14 May 2013

Alfresco Dining.

Hello!
Due to the front layout change I was left with a wall hung, sliding table rail and an adjustable leg.Ive made good use of it and made an outside alfresco dining table.Not sure wether the tabletop is too small,but as its only a piece of 12mm ply at the moment,I can always cut a bigger one!

Monday, 6 May 2013

Kitchen Cupboard

Hello !

The kitchen cupboard was slightly harder to make as it has an angled end panel ,plus a back panel which is seen when the side door is open.Its made in the same way as the bigger one that I made last post.Lots of cutting,glueing and laminating.Im pleased with the finished result though and am thinking to add a shelf to the inside as its quite tall and is being used as a food store.

I've nearly used up the four sheets of light oak board ( started cutting up the last one now) and it looks like another one maybe two will be needed.Next up is an outside table and some led lights under the cupboards to fit.

Stephen.


Sunday, 28 April 2013

Cupboard Progress

Hello!
Made the first wall cupboard and fixed it to the wall ! The front is made from strips of 12mm ply which are biscuit jointed and glued together and the base is one piece of 12mm ply.They where then laminated with some 3mm light oak board.A length of radius corner is used to get the curved front.Batten is then fixed to the back and top edges for fixing.The doors are made in the same way.I will do a more detailed post later on as I forgot to take many pictures! I'm pleased with the results and have now started making the cupboard for above the sink.

Sunday, 21 April 2013

Boarding Out.

Hello! It's been loverly and sunny here this week so Ive made a start on fitting the lining boards.Decided to go with the light oak patten in the end.Its 3mm thick , 8 x 4 sheets.Magnums delivered me 4 sheets , plus some knock in edging and a radius corner all in light oak.Also I needed to buy a router bit for cutting the slot for the knock in edging trim.4 boards may not be enough,but will give me plenty to be getting on with.

Once cut the boards are glued in with good old PVA wood glue.I started with the wall behind the settee as this took a whole sheet.The settee base and one side of the wet room have now been covered.

The next job is to make a wall cupboard to go above the settee to house crockery and food.Ive made a start on it and will show the results in a Seperate post.

We decided last minute to wildcamp last night and drove up the road to Barton for the night.

Enjoy your van!

Stephen.


Sunday, 14 April 2013

Layout Change.

Hello! As we've been using the van for quite a while now,(even though its not finished) and the swivel seats are not fitted yet,it became clear that it was a bit cramped with the dinette seating and the table up.The rear seat didn't have seatbelts as it wasn't a travel seat and wasn't needed to carry passengers.So I decided to take it out and build a side facing settee.This would giveaway bigger seating area and more space in the gangway.
Theres a bit of extra work to do,mainly moving the batteries and wiring.The water heater stays in the same place and the batteries move to the other end of the new seat.The first picture shows the old seat removed and the second one is the basic framework in position.The frame is constructed from 18 x 44 softwood which is glued and screwed.The outside of the seat will be clad with some 3mm finishing ply.