Wednesday, 25 December 2013
Happy Christmas!
Happy Christmas to all ! 2014 awaits and van building will commence .Ive done a few things on the van,but it's been too dull and wet to take any pictures!
Sunday, 17 November 2013
Hot Air!
Sorry for the lack of blogging lately, but this has been due to other projects indoors.Mainly the building of a hearth and fitting a woodburner ready for winter and to try and make my gas bill less!
As the days have grown shorter it means its too dark to do anything in the week,so that only leaves weekends.I picked up the eberspacher from the menders a few weeks ago and it's been sat in the garage waiting to be fitted.
The basic fitting was covered in an earlier post ( heater fitting ) in July 2012. After bolting the unit back in I decided to hot wire the pump to get the fuel drawn from the tank.This proved a bit fruitless as there seemed to be lots of bubbles! After a couple of four non starts due to air bubbles , I made a trip to the motorists discount centre and bought a cyphoning kit.This comprises of a small hand pump with two lengths of clear tube.After pumping for a while and tightening the unions at the stand pipe end,the bubbles disappeared and clear diesel flowed.After switching on the controller again it fired up and started to produce lots of loverly hot air!

Next job is to fit the ducting.My plan is for two outlets,one into the main part of the van and the other into the wet room ,so this can double up as a drying area.
I've also started to fit the corner edgings,pictures to follow.
Sunday, 27 October 2013
Single Seat Fitting.
Hello!
 Firstly remove the double seat,two bolts at the front and two star bolts at the back.You don't need to wind out the back ones all the way,as the seat will slide back off of them once they are loose enough.
 Seat removed and ready for the single one.I bolted the whole seat in first and then seperate it from the base to fit the swivel.
 Swivel bolted to the base and now single seat can be sat on top and bolted down.
 The finished job! The seat belt tensioners need to be plugged in next to the yellow plug under the seat.At the moment I have coiled up the second pretensioner under the seat.You can leave it like this or obtain a resister which when fitted fools the computer into thinking there's still three seatbelts.This is the route that I'm taking and will do a seperate post when it's done.
I've now fitted the single passenger seat and the swivel that I bought a couple of weeks ago.The actual job was quite easy,the swivel that I've used is a CTA one.This is the easiest swivel that I've ever fitted.All the holes lined up and instructions where brief ,but too the point! And enough fixings to do the job.
I now need a second swivel for the drivers seat.I purchased the CTA swivel from Spirit Leisure,there's a link in the links section.
Tuesday, 22 October 2013
V5
Hello!
I posted off the V5 with a covering letter and a dozen pictures of the van,and today the V5 came back as a motorcaravan ! Yippee .This took about three weeks to be returned.
Also a seat swivel has arrived so single seat fitting can now commence.
Wednesday, 9 October 2013
Single Seat
Hello!


Things have been quiet on the van front lately due to other projects.I have managed to buy a single passenger seat though! Its brand new and awaiting fitting, a couple of seat swivels need to be purchased to complete the front lounge area.I'll cover fitting in a seperate post.
Also managed to fit the kitchen roll holder that I bought sometime ago.
Saturday, 21 September 2013
Wardrobe
Just a quick post,finished the inside of the wardrobe today .Lined the back wall with some offcut of ceiling board and painted the rest with some white kitchen/bathroom paint.Fitted the rail and a rather nifty light from Lidl.Its a battery operated senser light,seems to work quite well .I just need to tidy the wiring and fit the back trim panel.

Sunday, 8 September 2013
Floor Covering.
Hello there!


I've finally got round to choosing and fitting the floor covering.We decided on some vinyl cushion flooring in a wood block patten.Its easy to keep clean and warm under foot.Choosing it was the easy part of the whole exercise !
I made sure that there was enough to cover the whole flor of the van,including the garage area under the bed.It did take longer to fit than I anticipated,due to the amount of cutting and scribing in.Its stuck down with spay glue.The finished results are very pleasing and another job ticked off the list.
We've been busy using and camping in the van lately,hence the lack of jobs completed.
There are a number of other jobs which I will be attempting in the next month or so,these are:
Finish fitting the heater ( top of the list due to this glorious summer ending soon ).
Water ingress through the rear light units.
The inside of the wardrobe ( walls,ceiling,hanging rail ).
Waterproofing around the wet room door.
Over cab cupboard front.
Sunday, 18 August 2013
Wildcamping
We stayed at a nice seafront location in Hampshire last night.It was a bit windy at first,but eased off and we had a nice quiet nights camp. A really nice spot with great views.
Saturday, 3 August 2013
Flat Tyre!
It was only flat on the bottom though! I was cutting a piece of wood for another cupboard and suddenly heard a loud hissing noise coming from the van.The noise was from the n/s rear tyre,and after closer inspection was actually the valve leaking.The rubber was perished and just randomly decided it couldn't take anymore!
By the time it took me to get a trolley jack from the garage it was flat.A trip to the tyre menders and a new high pressure valve and balance later all is well.i really glad that the valve let go while the van was parked up and not being driven on the road.Back to the cupboard building now .


By the time it took me to get a trolley jack from the garage it was flat.A trip to the tyre menders and a new high pressure valve and balance later all is well.i really glad that the valve let go while the van was parked up and not being driven on the road.Back to the cupboard building now .
Wednesday, 31 July 2013
Wardrobe/Fridge unit.
Hello!
The fridge has been secured in place with a bracket fixed to the wall which stops it sliding forwards .The front of the unit has now been faced with some light oak board.This took a bit of time as I wanted to use one sheet of board .The wardrobe door opening ,slide out shelf and fridge opening were marked out and cut.This left not a lot,which was quite flimsy.Once glued to the front it was ok.The wardrobe door was made and hung and the top of the slide out shelf is also now finished.
The small area of wall behind the sink has been faced with some oak board.Next up is to make a panel for above the cab and a wall cupboard for above the bed.
Sunday, 21 July 2013
Camping Trip.
Hello!
We met up with some family, who are staying on a small site in the New Forest.Had a BBQ ,a few glasses of red and stayed the night.A really nice quiet site with minimal facilities ( water tap,rubbish bin and toilet emptying.its set back from the main road ,so quite peaceful .
http://www.danestreamfarmshop.co.uk/farm-campsite-new-forest.html
Tuesday, 16 July 2013
Doors.
Hello !
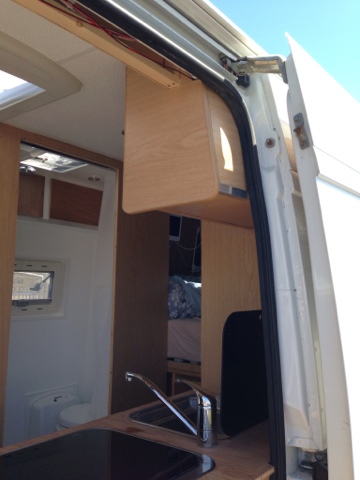
I placed an order with magnums for some more light oak board ( 4 sheets ) ,1 sheet of hard glaze,a radius corner,a corner trim and some locker lining.This should be enough to make all the doors ,rear locker and panels for the side door.
I made a start at the weekend by making the wet room door.This was made with a piece of 9mm ply ,which was sandwiched between 3mm light oak on the front and 3mm hard glaze on the inside.The door ends up at 15mm thick and after routing out a 2mm groove, some 15mm knock in edging is used to finish the edges.
It was quite a lot of work,toiling in the heat 29* ! But I'm not complaining as we've waited long enough for the summer to arrive! Anyway back to the door,which is the biggest one that needs making and quite heavy! So I've used 3 hinges to hang it ( double cranked ). The push latch took a few measures ,check and measure again, before drilling a 25mm hole through the door.
It looks quite good and its nice to have a door on the bathroom at last.Ive hung it so that it opens towards the front of the van,thus creating a dressing area where you can't be seen from the front lounge area.Next job is to line the front of the wardrobe/fridge unit and make the wardrobe door.
Stephen .
Tuesday, 25 June 2013
Rear View Cameras
Hello! This post is dedicated to the rear view camera system that's been on the van for about a year now.I bought a kit off eBay which consisted of a monitor, camera and all fittings for just under £50.The van wasn't fitted with a rear view mirror as the back doors were panelled in.Firstly I made a metal bracket and fitted the monitor to the grey plastic trim that the interior light fits too.The camera is fitted above the rear doors and is switched on all the time whilst driving.The camera has quite a wide beam and makes a very good rear view mirror.The direction is switchable on the monitor making it ideal when driving abroad.
When I realised that the monitor was able to work two cameras, another one was purchased.This came from eBay and was £11.Its a much smaller camera which has distance marks which show up on the monitor,making it ideal for reversing up close to things.Another small bracket was made and the camera fitted under the bumper.Everything is wired through the LB electrics so the monitor can be switched on perminatly.
Overall the system works very well and is a good addition to aid rear vision and reversing.
Tuesday, 18 June 2013
Extra Work Surface ( Part 2).
Here's the other folding work top.Made with 2 metal brackets that I bought from Screwfix .It has a temporary top at the moment and we havn't decided on the colour of laminate to use for finishing.


Thursday, 13 June 2013
Extra Work Surface ( Part 1).
Hello!
We've Been using the van a lot lately for days out enjoying the sunshine . I like cooking in the van ,but there's a distinct lack of work surface! Now, I know that there are compromises that have to be made due to internal size and layout etc.So this problem needed addressing urgently.
I've fitted a smev sink ( no drainer ) and a three burner hob.The draining of crockery etc is taken care of by the purchase of a plastic unit from Lidl.This works well,but when the sink and hob are in use at the same time, there's nowhere to put it!
The front of the wardrobe is not finished yet,so I had an idea for a pull out work top.This has been made using a pair of sliding drawer runners.They have ball bearings inside and work very smoothly.the top is a prototype at the moment and will be changed fora thicker piece of ply and laminated with Formica to match the other surfaces at a later date.
I'm pleased with the result and next job is to make a fold up surface for the other end of the kitchen unit.
Stephen .
Sunday, 9 June 2013
Cab Curtain
Hello! This post has been requested by Christine!
A cab curtain is a duel purpose fitment.In winter time,when drawn it keeps heat in the back ( as the front of the van isn't double glazed).In summertime drawing the curtain on a hot sunny day ( something of a novelty in England !!), keeps the back cool, as the front cab area acts likes green house.Also when trying to stealth camp in urban areas drawing the curtain blocks out light being omitted from the rear.
For my curtain I bought a black fleece throw and cut it in half.Ive done this as we mainly wildcamp and if we need to drive off at short notice then the curtains can be parted for quick access to the cab.I also wanted the sides of the curtains to be tight fitting.This is going to be achieved by using iron on Velcro . The passenger side has been completed.Velcro was cut to length and one piece has been glued to the side of the door pillar,next to the sliding door rubber.This allows a tight fit and stops light,draughts coming through.The other piece of Velcro is then ironed on to the side of the curtain.
The curtain fits very well and as the side sticks to the pillar ,it doesn't blow about when the The sliding door is opened on a windy day.At the moment the curtains are hung using a wire,but this is only temporary until the cupboard above the cab is finished.
Tuesday, 14 May 2013
Alfresco Dining.
Hello!
Due to the front layout change I was left with a wall hung, sliding table rail and an adjustable leg.Ive made good use of it and made an outside alfresco dining table.Not sure wether the tabletop is too small,but as its only a piece of 12mm ply at the moment,I can always cut a bigger one!

Due to the front layout change I was left with a wall hung, sliding table rail and an adjustable leg.Ive made good use of it and made an outside alfresco dining table.Not sure wether the tabletop is too small,but as its only a piece of 12mm ply at the moment,I can always cut a bigger one!
Monday, 6 May 2013
Kitchen Cupboard
Hello !
The kitchen cupboard was slightly harder to make as it has an angled end panel ,plus a back panel which is seen when the side door is open.Its made in the same way as the bigger one that I made last post.Lots of cutting,glueing and laminating.Im pleased with the finished result though and am thinking to add a shelf to the inside as its quite tall and is being used as a food store.
I've nearly used up the four sheets of light oak board ( started cutting up the last one now) and it looks like another one maybe two will be needed.Next up is an outside table and some led lights under the cupboards to fit.
Stephen.
Sunday, 28 April 2013
Cupboard Progress
Hello!
Made the first wall cupboard and fixed it to the wall ! The front is made from strips of 12mm ply which are biscuit jointed and glued together and the base is one piece of 12mm ply.They where then laminated with some 3mm light oak board.A length of radius corner is used to get the curved front.Batten is then fixed to the back and top edges for fixing.The doors are made in the same way.I will do a more detailed post later on as I forgot to take many pictures! I'm pleased with the results and have now started making the cupboard for above the sink.

Made the first wall cupboard and fixed it to the wall ! The front is made from strips of 12mm ply which are biscuit jointed and glued together and the base is one piece of 12mm ply.They where then laminated with some 3mm light oak board.A length of radius corner is used to get the curved front.Batten is then fixed to the back and top edges for fixing.The doors are made in the same way.I will do a more detailed post later on as I forgot to take many pictures! I'm pleased with the results and have now started making the cupboard for above the sink.
Sunday, 21 April 2013
Boarding Out.
Hello! It's been loverly and sunny here this week so Ive made a start on fitting the lining boards.Decided to go with the light oak patten in the end.Its 3mm thick , 8 x 4 sheets.Magnums delivered me 4 sheets , plus some knock in edging and a radius corner all in light oak.Also I needed to buy a router bit for cutting the slot for the knock in edging trim.4 boards may not be enough,but will give me plenty to be getting on with.
Once cut the boards are glued in with good old PVA wood glue.I started with the wall behind the settee as this took a whole sheet.The settee base and one side of the wet room have now been covered.
The next job is to make a wall cupboard to go above the settee to house crockery and food.Ive made a start on it and will show the results in a Seperate post.
We decided last minute to wildcamp last night and drove up the road to Barton for the night.
Enjoy your van!
Stephen.
Sunday, 14 April 2013
Layout Change.
Hello! As we've been using the van for quite a while now,(even though its not finished) and the swivel seats are not fitted yet,it became clear that it was a bit cramped with the dinette seating and the table up.The rear seat didn't have seatbelts as it wasn't a travel seat and wasn't needed to carry passengers.So I decided to take it out and build a side facing settee.This would giveaway bigger seating area and more space in the gangway.
Theres a bit of extra work to do,mainly moving the batteries and wiring.The water heater stays in the same place and the batteries move to the other end of the new seat.The first picture shows the old seat removed and the second one is the basic framework in position.The frame is constructed from 18 x 44 softwood which is glued and screwed.The outside of the seat will be clad with some 3mm finishing ply.


Theres a bit of extra work to do,mainly moving the batteries and wiring.The water heater stays in the same place and the batteries move to the other end of the new seat.The first picture shows the old seat removed and the second one is the basic framework in position.The frame is constructed from 18 x 44 softwood which is glued and screwed.The outside of the seat will be clad with some 3mm finishing ply.
Sunday, 7 April 2013
Progress Report
Hello everyone, Im back ! March was a bad month for me for a few reasons.Firstly I had no spare cash to spend on materials as work was quiet in Jan and Feb.I have to cut all the boards and wood outside and the weather has been crap!
Things have changed for the better now though! Work has picked up and the weather seems to be as well! So after finally deciding the choice of wall covering I placed an order with Magnums.4 sheets of 3mm light oak boards ,knock in edging and radius corner strip.Also bought a router bit to cut out the slot for the knock in edging.
I can't praise the service of Magnums enough,being as they are in Grimsby and I'm in the Deep South of England.I ordered the bits and they arrived next day,fully intact and the boards were very well packaged so all the corners of the boards were intact!
I have enough materials for a big push now, so should be posting more progress soon.
Happy building
Stephen.
Sunday, 24 February 2013
Wildcamping.
Hello!
We found a new spot on the way back from Brighton last night.Its in West Sussex and right next to the beach.Another van joined us later on in the evening.It was quite cold and only 4.5* inside the van this morning.Brrr need to get the heater working! A loverly spot though and we will probably stay again.

We found a new spot on the way back from Brighton last night.Its in West Sussex and right next to the beach.Another van joined us later on in the evening.It was quite cold and only 4.5* inside the van this morning.Brrr need to get the heater working! A loverly spot though and we will probably stay again.
Monday, 18 February 2013
FREE Motorhoming UK
Hello! If like us you like Wildcamping and feel that you would be a captive audience if you stayed on sites all the time,then this is a forum that's well worth a look.Its a new site which is growing every week and offers lots of information on all types of Wilding ,Stealth camping and Boondocking.
At the moment a map of free stop overs and Wildcamping sites is being compiled. This site is Free to join and use its infomation.There is a link to Free Motorhoming UK in my links section.
At the moment a map of free stop overs and Wildcamping sites is being compiled. This site is Free to join and use its infomation.There is a link to Free Motorhoming UK in my links section.
Sunday, 17 February 2013
1'st Wildcamp Of The Year.
Hello! We finally managed to get our first camp of the year in.We had to make a trip to North Devon and on the way back we stopped off at a nice spot in West Dorset,by the sea.
This picture was taken with my new phone which has a flash!
Looking at the stats for this blog I can see that the audience is very varied and I receive a lot of page views from Denmark,so I'd like to say to my Danish viewers. Hej til alle de danske campingvogn!
Happy travelling !
Stephen.

This picture was taken with my new phone which has a flash!
Looking at the stats for this blog I can see that the audience is very varied and I receive a lot of page views from Denmark,so I'd like to say to my Danish viewers. Hej til alle de danske campingvogn!
Happy travelling !
Stephen.
Monday, 28 January 2013
Jobs On Another Van
I havn't done anything on the van lately because Ive been fitting some goodies to my Brothers van.he full times in his van so wants to be as self sufficient as possible as he's off grid.
He's gone for a twin 6kg refillable system with an auto changeover valve.The whole kit was bought from FES Autogas.The system was quite easy to fit and needed a 70mm hole cut in the side of the van for the filling point ( the black circle in the bottom left of the first picture ). Both bottles took £18 to fill which is roughly what you pay for an exchange calor of the same size,so he's saving money already.The heating is blown air Truma and with the fridge and hot water he should need to refill once a week.
Next job was to fit two 100 watt solar panels on the roof. There was enough room for them side by side in the middle.Panels glued on and hole drilled for cables,it was all finished in a couple of hours.They started working straight away,even though its been quite cloudy today.He just needs to add another battery and his system is complete .
Tuesday, 8 January 2013
Gas Tank Filling Point.
As requested here is a pic of the van showing the gas tank filler point.They didn't come in white,so its the black circle behind the drivers door.
Stephen.

Stephen.
Tuesday, 1 January 2013
New Year!
Hello! What a great start to the year it's been,dry and sunny.We loaded up the van with food and headed for Bournemouth pier.The undercliff is a good place to park up as you are right next to the beach and a short walk from town.
Happy New Year to all you campers and Travellers.

Happy New Year to all you campers and Travellers.
Subscribe to:
Posts (Atom)